Bathrooms
Apartments, depending on type and location, are fitted with the following sanitary wear and fittings:
Phase 1
| Specification | ||
|---|---|---|
| Item | Flank A (mainly) | Flanks B & C (mainly) |
| Bath | Villeroy & Boch - ‘Rebana’ Ref BA170PAR3LIV | Kaldewei Puro 653 |
| Bath filler & integral waste | VADO WG-61552 | Grohe Tallentofill code 19952, concealed parts code 28991 |
| Bath/shower diverter | VADO CEL-148B/2/SQ | Grohe Rapido T code 35500, faceplate Grohe 3000 code 19567, bath faceplate Grohe 3000 code 19568 |
| Toilet | Vitra ‘Retro/Pure Style’ ref 5160 with soft closing seat ref 55-003-009 | Vitra Zentrum wall hung code 5785, soft close seat code 009 |
| Frame to WC | Grohe Rapid SL ref 38773 | Grohe Rapid SL ref 38773 |
| WC push plate | Grohe Skate Cosmopolitan | Grohe Skate Cosmopolitan ref 38732 |
| Basin | Vitra ‘Retro/Pure Style’ ref 5214 with semi pedestal ref 5157B003-0156 | Vitra Zentrum code 5632 with semi pedestal code 5821 |
| Bathroom tap | Mono basin mixer tap ref VADO 200-100 | Grohe Concetto Ecojoy code 32204 |
| 1 bed & en suite shower head (selected types) | Grohe ref 27253 | Grohe ref 27253 |
| 1 bed & en suite thermostatic shower valves | VADO CEL-148B/SG-3/4 | Grohtherm 3000 Cosmopolitan code 19568 |
| 1 bed & en suite shower door | Lakes bathrooms semi frameless slider door 1500 wide, ref
LKV2S150 05 | |
| En suite shower door (2 bed) | Lakes bathrooms framed bi-fold door 1000 wide, ref LK1B1000 05 | |
| En suite shower door (3 bed) | Lakes bathrooms semi frameless slider door 1500 wide, ref LKV2S150 05 | |
| Heated towel rail | Sol*Aire Bray electric towel rail - SW580P 500w x 800h | Sol*Aire Bray electric towel rail - SW580P 500w x 800h |
Phase 2
| Item | Specification |
|---|---|
| Bath | Trojan Cascade Single Ended Bath 1600 x 700 |
| Bath mixer | Hans Grohe Thermostatic bath mixer, chrome Ref 13123000 |
| Shower mixer | Hans Grohe Thermostatic shower mixer, chrome Ref 13122000 |
| Cistern | Grohe WC Concealed Cistern, Ref 38661000 |
| Flush plate | Grohe Skate Cosmopolitan Flush Plate, Ref 38732000 |
| Tap | Grohe Essence basin mixer, Ref 32898001 |
| Shower set | Hans Grohe Shower set 100 Vario with shower rail 65cm, Ref 26532400 |
| Wall hung sink | Bloque 500mm rectangular basin with one tap hole Ref LW1056 |
| Countertop basin | Free standing bowl 28cm rectangle basin with one tap hole, Ref FSBVWB28 |
| Toilet | IMEX Essence back to wall WC, Ref CB10100 |
| Bath screen | KONSS - Koncept radius edge bath screen, chrome, 6mm toughened safety glass |
| Shower screen | Merlyn IONIC Essence framed sliding shower door |
Notes
Water usage
To reduce water consumption the toilet uses a dual flushing system.
Care and maintenance instructions
Basins and baths
Trays and tops should be cleaned and dried as soon as possible after use to prevent build up of soap residue. If the water is hard, insoluble lime salts and grime will harden on the surface and become increasingly difficult to remove. To prevent scratching of bathroom fittings it is important that only non-abrasive cleaners are used. In the interests of safety, baths and shower trays must not be polished with wax or silicone polish. A sealant has been applied around the bath and/or shower tray where water splashes occur. This should be checked regularly and maintained as required to ensure water resistance.
Shower heads
Heads should be cleaned and de-scaled if necessary.
Taps and hinges
Under no circumstances should cleaners containing any abrasive agents or chemicals be used. The use of cleaners of this type, whether on stainless steel, chrome, gold or white taps or hinges, will abrade any protective surfaces and cause corrosion. Soapy water, silicone or wax polishes should be used instead.
Toilet cisterns
Each toilet cistern incorporates an integral overflow system. This system should reduce the amount of water wasted due to a faulty cistern valve and alert residents more quickly to a problem. In the event of the valve failing to stop water entering the toilet cistern:
- The toilet pan flush buttons may be disabled and it may not be possible to flush the toilet
- The excess water will continuously be disposed of directly into the toilet pan
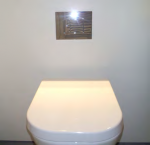
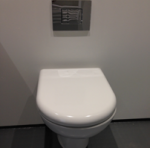
Access to the cistern is gained by removing the flushing button panel (Images 1 and 2).

